Apache Spark in Microsoft Fabric

If you have used Spark in Azure Synapse, prepare to be pleasantly surprised with the compute experience in Microsoft Fabric as Spark compute starts a lot faster because the underlying technology has changed. The Data Engineering and Data Science Fabric experiences include a managed Spark compute, which like previous Spark compute charges you when it is in use. The difference is the nodes are reserved for you, rather than allocated when you start the compute which results in compute starting in 30 seconds or less versus the 4 minutes of waiting it takes for Azure Synapse compute to start.  If you have different capacity needs that a default managed Spark compute will not provide, you can always create a custom pool.  Custom pools are created in a specific workspace, so you will need Administrator permissions on the workspace to create them. You can choose to make the new pool your default pool as well, so it will be what starts in the workspace.

Writing Spark Code in Fabric

If you are writing code in Spark, the two languages you will most likely be using are Python or Scala, but you could also chose Java, Scala, R, or ANSI SQL. Notice that unlike with Azure Synapse, .Net is not included as a language you can use, which is an interesting development. The other thing to keep in mind when writing SQL code in Spark is you will be writing ANSI SQL, not TSQL which you use in Lakehouses and SQL endpoints within Fabric. While TSQL is ANSI compliant, I realized the extent of the differences when trying to use some of the DATEPART TSQL commands as they have underscores in Spark and you use instr instead of TSQLs CHARINDEX. The differences are minor and stackoverflow or copilot can help you with the differences. Just remember that you may not be able use the exact same code as in the SQL endpoint and you will be fine.

Lakehouse Integration and Autogenerated Code

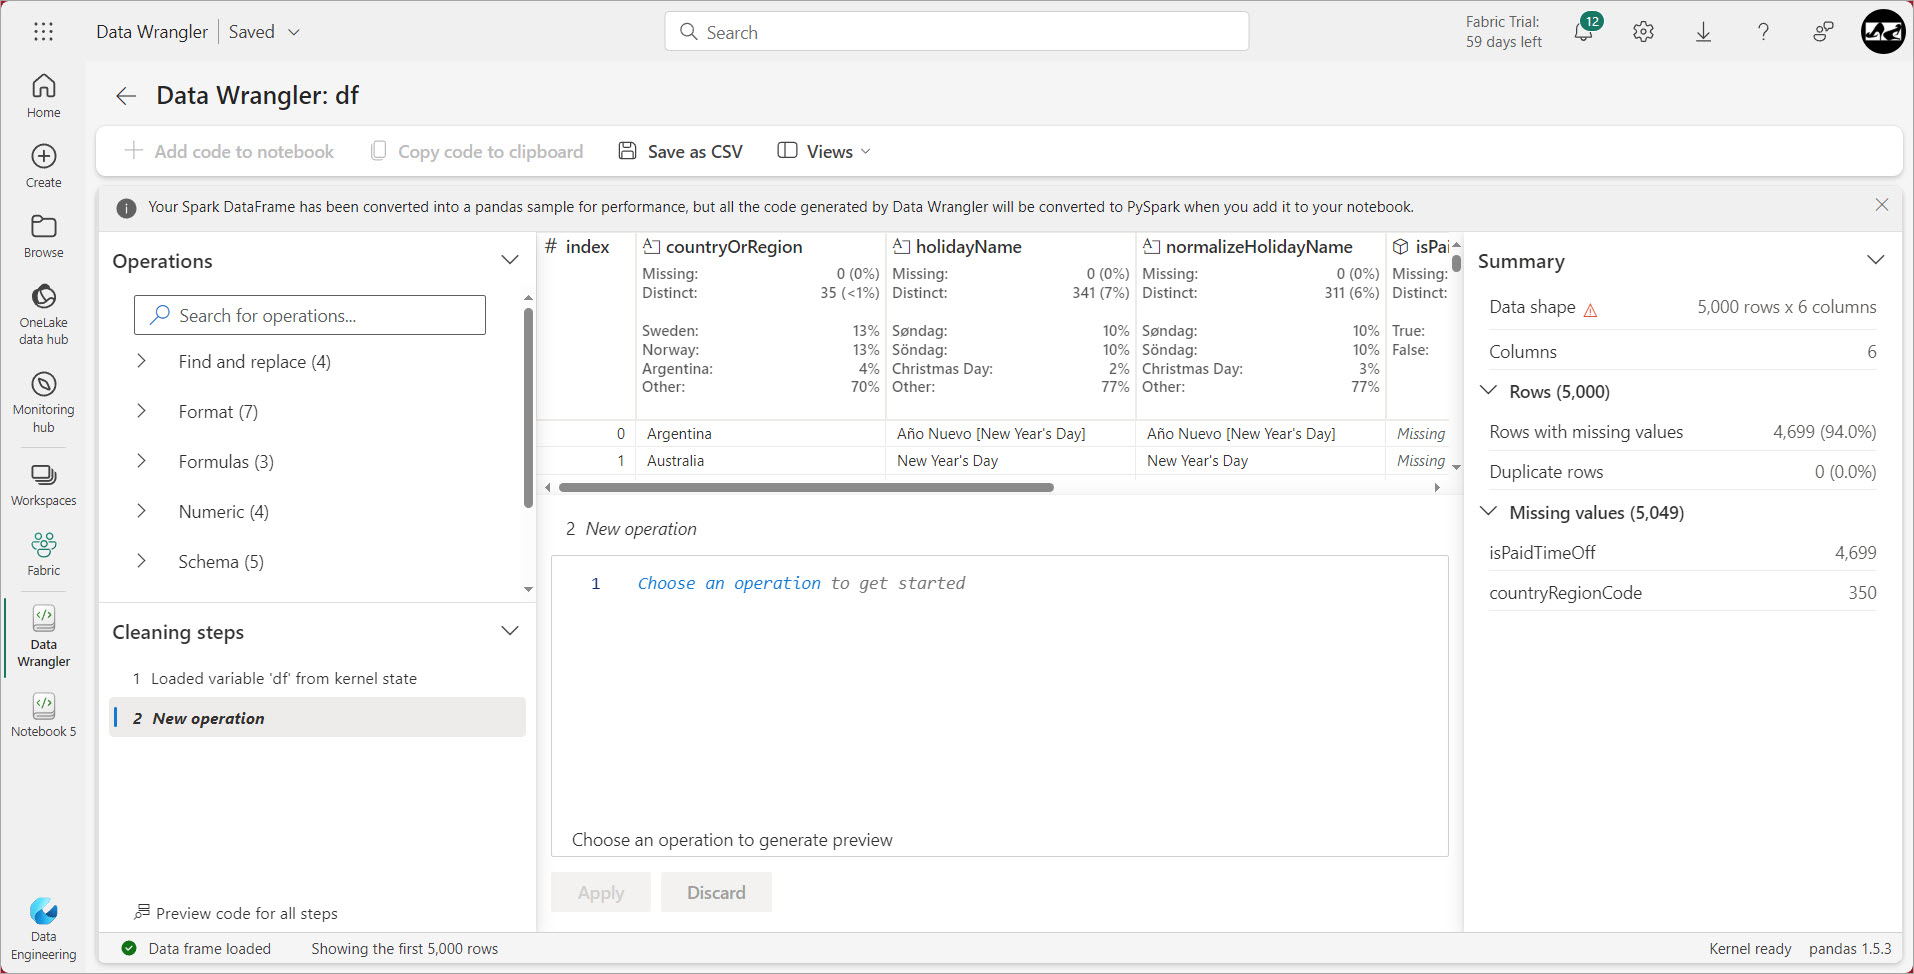
Like all Fabric experiences, the lakehouse is an integral part of the coding experience. When you create a new notebook, the first step is to add a lakehouse. Once it has been added, you can drag and drop elements inside of the notebook and fabric will write the code for you. Literally this code block shown below was created when I dragged over the table publicholidays into the notebook.

Autogenerated Spark dataframe using the clicky-draggy method

Generating code with Copilot in Spark

Fabric in Spark includes a library called chat-magics, and this library includes AI features which you can incorporate in your code if you have copilot enabled in your tenant.  There are a few administrative steps you need to include to make that work.  To enable copilot the first step is to see if it is supported in your Fabric tenant as it is not available everywhere.  Check the list to make sure it is possible. Also you will need to pay for the feature as Copilot is not available as part of the free trial and you will need a Fabric F64 SKU or a P1 capacity to use it. Once you have validated you can use Copilot, you will want to go to the Administrative settings and enable Copilot in your tenant, as shown below.

Fabric Copilot Admin settings

Once Copilot is enabled and active, you will be able to enable it by clicking on the copilot icon on the far right of the screen.  If you don’t see it, click on the ellipse, the three dot menu where Microsoft hides all the cool stuff and you will see the icon in a dropdown menu.

Chat-magics: Copilot spark help

Here are 6 Chat magic commands designed to help you with your code.

%%chat – Designed to provide answers for you regarding items in your code such as variables
%%describe – Provides a summary of the contents of a dataframe
%%code  – Explain what code you want written and copilot will generate it for you
%%add_comments – Most people forget to comment their code, and if this is you you can have AI generate meaningful comments for you.
%%fix_errors – Using this command, copilot will try to fix dependance, configuration and resource allocation errors for you.

In my next post I will provide examples of how to use chat magic commands in Fabric.

Yours Always,

Ginger Grant

Data aficionado et Data Raconteur


Fabric Features not found in Azure Synapse or Power BI – Data Activator

Fabric Admin Portal Tenant Settings for Data Activator

With the GA release of Fabric in November, 2023, I am dedicating several posts to new features which you will not find in Power BI or Azure Synapse, and the latest one I want to talk about is Data Activator. Data Activator is an interesting tool to include inside of Fabric because it is not reporting or ETL, rather it is a way to manage actions when the data hits defined targets.  It is a management system for data stored in Fabric or streamed in Azure using IOT or Event Hubs. You can use Data Activator to monitor the current state or to define actions to occur when certain conditions occur in the data.  Data Activator is still in preview, but you can evaluate it now.

Using Data Activator

Getting started in Data Activator requires you to have access to the Tenant Administration features of Fabric.  I have included an image of the Admin Portal Tenant settings so that you can see the Data Activator Option which must be enabled.  After this change has been made you will see the option for Data Activator in the icon menu in the bottom right corner.

Fabric Admin Portal Tenant Settings for Data Activator

Fabric Admin Portal Tenant Settings for Data Activator


Monitoring Data with Data Activator

Data activator is designed to process data in either real time or in batch and then do something with it. For example, let’s say that you are responsible for ensuring that a set of refrigerators are operating at tolerance for a set of retail stores. A series of IOT devices is in each refrigerator, which periodically sends the ID of the device and a temperature. If a temperature records over 40 Degrees Fahrenheit for 30 minutes, a work ticket should be created, and technician should be dispatched to solve the problem. If your data is batched, you may decide that if your KPI numbers are below thresholds you set, that someone should investigate why for example the number of yards of concrete poured yesterday was down significantly as perhaps there could be something that you could do to keep the issue from happening today. Reports will show you that these sorts of events occurred, and then the person monitoring the values in the report are supposed to take action. With Data Activator, you create triggers to initiate the action which should happen in response to the changes in data.

Triggering Action

The first step for creating actions in Data Activator is to connect to your data source then you can create a trigger. The Trigger alerts are similar to alerts you may have created on a Power BI Dashboard, where you provide a measure, time interval, then a rule and then which workspace to save the trigger in. Before you create the trigger, you need to create elements which support it. In our example where we are monitoring the freezer temperatures, we have a Unique Event Id which we are going to use to create an object, which we will call Fridge Alert. Once we create the object with the Transaction ID, we will then add properties to it of temperature and location. Lastly we will need a measure for the average temperature over 40 for 15 minutes. We will call that new measure Chill Alert. We can see how many times that has occurred over the last 24 hours in the data pane. Now that we have an alert, we will create a trigger action, sending an email when it occurs. We fill out the email as shown here.

Data Activator Trigger Action Pane

We can also triggger a Power Automate action to create a dispatch event as well. Selecting the start button will start the trigger data evaluation. As you can see, Data Activator can help you easily monitor your data by completing some very simple steps.  I hope that you check out this Fabric feature as it really takes monitoring data to the next level.

Yours Always,

Ginger Grant

Data aficionado et SQL Raconteur

Fabric Features not found in Azure Synapse or Power BI – Data Wrangler

Fabric Features not found in Azure Synapse or Power BI – Data Wrangler

The second element in my series on new Fabric Features is Data Wrangler. Data Wrangler is an entirely new feature found inside of the Data Engineering and Machine Learning Experience of Fabric. It was created to help analyze data in a lakehouse using Spark and generated code. You may find that there’s a lot of data in the data lake that you need to evaluate to determine how you might incorporate the data into a data model. It’s important to examine the data to evaluate what the data contains. Is there anything missing? Incorrectly data typed? Bad Data? There is an easy method to discover what is missing with your data which uses some techniques commonly used by data scientists. Data Wrangler is used inside of notebooks in the Data Engineering or Machine Learning Environments, as the functionality does not exist within the Power BI experience.

Step-by-step Data Wrangling

The example I am going to walk through here uses the public holiday sample dataset, which you can load by clicking on the Use a sample button with Data Engineering, and selecting Public Holidays. Once you create a lakehouse with the sample data, you can follow along with the steps in this blog for doing your own data wrangling.

From within the Data Engineering Environment, select the notebook from the + New dropdown menu to create a new notebook. You will need to add some data to the lakehouse inside of the new notebook. To do this, click on the green Add button in the lakehouse section of the screen to add your Public Holiday Lakehouse. After the lakehouse is loaded, you will have two file folders, if you click on the one labelled Files, you will see two more folders. Click on the folder called sample_datasets, which makes it turn green and you will see a list of files in the sample_datasets pane which opens up. If you click on the ellipse menu next to public_holidays.parquet, you will see a popup window. In that window, select Load data and you will see two options, Spark and Pandas. The screen image shows what it looks like.

When Fabric was first released, the only option available for Data Wrangling was pandas, which is not Spark compliant. For more information regarding Pandas, check out my blog on Koalas where I cover why you don’t want to use pandas. I am very happy to see the Spark dataframes option as it is spark compliant, and can then take advantage of Spark’s superior memory and data management. However all of the generated code is pandas, and then converted to Spark. Data Wrangler will use Pandas no matter which option you select. We are now going to need to run this code which was generated for us so the data is loaded in a Spark DataFrame, by going to the Run menu and selecting Run all. This will start up the Spark cluster and run the code. You can look in the bottom left corner to see when it is complete.

Once you see the data you can start wrangling it. Go the Data tab and select Transform DataFrame in DataWrangler, then select the dataframe which was created for you, df.

Using Data Wrangler


In the Data Wrangler screen which is pictured here, you will see several interesting items. The first is at the top of the screen, where it lets you know that this code is pandas, but the code will be converted to pySpark when you leave Data Wrangler, but everything here will be pandas. This is important as if you end up with code you want to use, you can just use the generated code because it will be spark compliant. The top of the screen looks a lot like something you might see within Power Query if you have all the view items checked. Data Wrangler also shows missing and distinct as well as the top 3 values. On the left side of the screen there is a list of tasks which will generate code for you. I am going to select the first two of them, starting with Drop Duplicate Rows, which you can see in the screen shot image. This will immediately generate a line of code to drop the rows across all columns, but nothing will happen until the Apply button is clicked, which I will do so the code will be run. The applied steps are called cleaning steps and they appear on the bottom left side of the screen. Even if a step is applied it is not removed from the list, which seems odd. I am going to select the next option which is to delete missing values, and I am then prompted with a dropdown box to select which columns I want to drop if missing. I am going to pick all, then apply the change. At this point, since I completed the first two items, I don’t have anything missing as I deleted everything, so the next two steps will do nothing , as there is nothing missing. Clicking the option preview code for all steps allows me to see the generated code.
 If I want to run this code every time I get this dataset, I want to add it to a notebook, so I will select add code to notebook. Now in my notebook, I want to add pySpark code, which is different than the pandas code generated. Optionally I can add Pandas code, but I see no reason to do that. A popup window will appear showing me the code, at which point I can just click on the add button. The generated code is added to my notebook, saving me the tedium of having to write common code like this.

Data Wrangler is another automated tool which will write code for me similar to what I might expect if I was using Co-pilot. Data Wrangler contains decision making options and is generated based on my thoughts around which would be the best option in a given scenario. I can always return to Data Wrangler to add other steps or make different selections from the operations I chose. This tool can be really useful and I plan on using it to clean up my data in Notebooks.


Yours Always

Ginger Grant

Data aficionado et SQL Raconteur

Fabric Features not found in Azure Synapse or Power BI – Direct Lake

Power BI Data Architecturee for Semantic Data Modeling

With the general availability release of Fabric in November 2023, I am dedicating several posts to the features that are only in Fabric and not anywhere else. The first feature is Direct Lake. Direct Lake was created to address problems with Power BI Direct Query. Anyone who has used Direct Query knows what I am talking about. If you have implemented Direct Query, I am guessing you have run into one or all of these problems, including managing the constant hits to the source database which increase with the more users you have, user complaints about slow visuals, or the need to put apply buttons on all of your visuals to help with speed. Direct Query is a great idea. Who wants to import a bunch of data into Power BI? Directly connecting to the database sounds like a better idea, until you learn that that the data goes from Power BI to the database then back for each user one at a time, which means that Power BI must send more queries the more people are accessing reports. Users want to be able to access data quickly, have it scale well, and have access to the latest data.

Direct Lake Architecture

Direct Lake was designed to address the performance issues encountered by people who used Direct Query.  With Direct Lake you will connect to the existing data source live, but unlike Direct Query, you will be connecting not to a database, but to the Data Lake in OneLake. The diagram below from Microsoft shows the architecture of Direct Query for Power BI, Import, and of course Direct Lake.

Power BI Data Architecturee for Semantic Data Modeling

Power BI Data Architecture for Semantic Data Modeling

Direct Lake Performance

Direct Lake uses the same underlying technology that Fabric does, an implementation of Delta Lake on top of parquet formatted file. Delta Lake, is an open-source framework which is part of Spark and it allows parquet files to act more like databases as it contains ACID transations and DML operations which allow you to use common SQL Statements to modify and access the data. Microsoft has taken the underlying technology that the impemented in data warehousing, Polaris, to improve the way querying will work to make accessing data in OneLake faster.

Implementing Direct Lake

You need to have a Premium SKU, of P or F to be able to implement Direct Lake. Notice Premium Per User and A SKUs, commonly used for embedding do not have the ability to use Direct Lake. You also need to access the Admin Portal to ensure that the XMLA Endpoint is set to Read Write and the Integration settings to Allow XMLA Endpoints and Analyze in Excel is set to on. You can then provision a Fabric premium workspace lakehouse as your data source in Power BI when you use it as the sematic model for a report you create in the Power BI Service. Now you make look at this and think, well this is all well and good, but I don’t update the data lake as fast as I do my database, how am I going to make this work?

Mirroring

Mirroring proivdes the abilty to create a read only copy of your database in OneLake, which you can then use as a source for your Power BI reports. This was announced November 15, and should be releasing soon.  The way this will work is you will make a connection to the data source within Fabric, and a read only copy of the database will be created in OneLake. There is no ETL required. Just make the connection and the data is available.  I look forward to writing more about this feature when it is released as it will make it possible to have real time data access in Power BI.

Current Limitations of Direct Lake

As this is a new feature, there are some elements of Direct Query that are not there yet. Before you decide to use it you might want to understand some of the current limitations. The first is there is no way to create a Direct Lake connection from within Power BI Desktop. You must create the reports that use it in the service. You cannot mix the lakehouse with existing models as it must be sourced from a single lakehouse or data warehouse. You cannot use views created in the lakehouse as tables in your Power BI semantic model. Direct Lake cannot be used in embedded. You also cannot use calculated columns or tables.  If you implement row level security (RLS), the model is switched to Direct Query.othI imagine many of these limitations will be addressed over time, and when they do, I will be writing an update to this post.

Yours Always

Ginger Grant

Data aficionado et SQL Raconteur

Four Different ways to incorporate Azure Synapse and Power BI

More and more I am working with Azure Synapse analytics as the location of data for Power BI, and there are 4 different ways that you can incorporate Power BI.

Incorporating Power BI inside of Synapse

The first is to connect Power BI to Azure Synapse to explore and visualize data. You can examine your datasets that you have loaded in your datalake with Power BI to help with the analysis of the data either for a data science solution or to determine how you are going to transform the data. For more information on how to do this, check out my previous blog .

Traditional Data Warehousing Sourced in Power BI

Once you have curated the data within Azure Synapse and it is ready for reporting, Power BI can do that too. Of course if you have large data and a dedicated SQL pool in Azure Synapse where your data warehouse is located you can use Power BI to visualize that large data. Given the fact that this solution is for data greater than a terabyte, you may also want to create some aggregated views in Azure Synapse to aggregate the larger data set.

Data lakehouse connection to Power BI

More and more I see companies wondering if they need a database. Some really don’t because their data sets are not that large, and what they want is a data source for Power BI. There are two different was of accomplishing this. Configure Power BI to connect to a Data Lake Gen2 to use data curated in Azure Synapse Companies are using Azure Synapse to create data lakes with data designed for reporting. See how you can connect Power BI to an Azure Data Lake Gen2 account which contains this data.

Serverless Database data source in Power BI

For my clients, what I recommend is to create a data lakehouse by curating a finite data set for Power BI reporting with a series of files in a curated folder. I will then create a Serverless data base in Azure Synapse and use that to connect to Power BI. What is great about that is if they need to run some kind of an adhoc query they can do that as well, providing a lower cost solution than was previously available.

If you are interested in hearing me talk about this topic, you might be interested in the recorded talk I gave to the DFW Power BI User group.

Regards,

Yours Always

Ginger Grant

Data aficionado et SQL Raconteur

Azure Synapse and Power BI

There are a number of different use cases for Azure Synapse, which no doubt you have already read about. Of course you can use Azure Synapse to build a scalable Data warehouse, use it to create machine learning solutions with Spark, but have you thought of why you might want to use it with Power BI? There are two ways which you can integrate Azure Synapse with Power BI: connecting to a Power BI Workspace from within Azure Synapse or using Azure synapse to provide the source of all of the data used in the Power BI data set. We will explore both methods in this blog.

Linking to Power BI from within Azure Synapse

From within Synapse you have the ability to access a Power BI workspace so that you can use Power BI from within Synapse.  Your Power BI tenant can be in a different data center than the Azure Synapse Workspace, but they both must be in the same Power BI Tenant.  You can use Power BI to look at any data you wish, as the data you use can be from any location. When this blog was written, it was only possible to connect to one Power BI workspace from within Azure Synapse. In order to run Power BI as shown here, first I needed to create a Linked Service from within Synapse. Select Power BI from the list of options, and then select the workspace from the list available for your tenant and create the linked service.  After the linked service is created, you can go to develop in Azure Synapse, and see the Power BI option listed on the left side of the screen.

Connecting Power BI to an Azure Data Lake Gen 2


As much of the functionality of Analysis services is being migrated to Power BI, many people are choosing to use Power BI instead of migrating to Analysis services, especially if you have Power BI Premium.   Another option you have is to gather the data that you are going to load into Power BI into an Azure data lake Gen 2 and create a “Data Lakehouse” as the container where you gather and clean up the data you are going to use in Power BI.  There are a few things that you will want to keep in mind if you want to configure Azure Synapse to do this.  The first is that your Power BI tenant and your Azure Data Lake Gen 2 must be in the same location.  Right now this is an issue as Azure Synapse is not available in all data centers.  To configure Power BI to use Azure, you need to go to the Admin section as shown above and select the subscription, resource group and storage account.  You will want to make sure that you have the proper permissions granted in Azure RBAC for user groups who need to access the data as they need storage blob owner permissions.  The Power BI services also need reader and data access roles granted as well.  You can use Azure Synapse to gather the data and then visualize it with Power BI.  I see a lot of use cases for this model as I suspect more people are going to be moving away from creating a database for Power BI and instead moving the datastore to Azure.


Regards,

Yours Always

Ginger Grant

Data aficionado et SQL Raconteur

Exploring Azure Synapse

In the past few months, I have been examining Azure Synapse and what it can do.  When it was first released in November of 2019, the first functionality that was rolled out was an update of Azure SQL DW.  For this reason, many people think that Synapse is just an improved version of a cloud data warehouse.  Microsoft did improve SQL DW when it moved it to Synapse.  The biggest architectural design change is the separation of the code from the compute, a theme with many web projects, which allows the compute power to be increased when need dictates and scaled down when computing needs change.  Within Synapse, resources are allocated as Pools and you can define a sql pools to run data warehouse and later change the compute to a different resource.  You will still need to partition your DW as large datasets require partitioning to perform well.  Subsequently Microsoft Released the Azure Synapse Studio to be a container for a larger environment of tools and notebooks to interact with them.

Non-Data Warehouse Elements of Azure Synapse

To me the more interesting parts about Azure Synapse have nothing to do with data warehouses.  Azure Synapse also contains the ability to query files stored in Azure Data Lake Gen 2 as if they were SQL files. This is a great way to analyze large data without first cleaning it up and putting it into a relational environment. Within Synapse you can formulate a query using syntax for selecting parts of files, providing the ability to look at many files as if they were one. You can also create processes which bring data into your synapse environment using Orchestration, a process that people who are familiar with Azure Data Factory will find very familiar. Synapse also contains the ability to analyze data in Cosmos DB without doing ETL or moving the data at all using a scalable architecture which will not impact the transactions being processed simultaneously on the same Cosmos DB.

Azure Synapse and Spark

Check out the promotional video here

By far the most interesting component of Azure Synapse is the Spark connection. Microsoft has added the ability to create Spark Pools into Azure Synapse.  To be honest I was somewhat surprised that this functionality is included here first and not in Azure Machine Learning, where to use Spark you need to access clusters created them in Databricks.  Spark provides the ability to dynamically scale resources when running processes.  This is very handy when writing machine learning code which can really use the performance improvements Spark brings.  Because this is Microsoft’s Spark, you can also write your code to access it in .Net if you like, in addition to the more common Spark Languages, Scala, R or Python.  You can also incorporate the AutoML API created for Azure Machine learning in R and Python so that you can use the power of Azure to select your algorithm and hyperparameters instead of spending time doing it yourself.

Getting up to Speed with Synapse

There is a lot to learn when it comes to Synapse as it combines a lot of different components into one environment. As more and more data is being migrated to the cloud, it is uniquely designed to handle both big data components containing raw data, managed data lakes as well as more traditional data warehouse needs.  It can also be the location where all of the data is processed, secured, cleaned and analyzed using Machine Learning. There is a lot to cover and since it is new, there is not a lot of places yet where you can learn more about it.  If you are interested in a deep dive on Azure Synapse and how to use it in a Modern Data Warehouse, sign up for my precon at PASS Summit 2020 where I will cover the topic in depth.


Yours Always

Ginger Grant

Data aficionado et SQL Raconteur

Using Koalas in Spark

koala getting hlep from a Firefighter

The Apache Spark open source organization maintains all of the documentation for Apache Spark, which is a set of APIs which are used in Databricks and other big data processing applications.  The documentation provides the detailed information about the libraries, but the instructions for loading libraries in Databricks are not exactly the same as are used in Databricks, so if you follow the Spark installation instructions, you will get nowhere. If you follow the steps listed you will be up and running in no time.

Installing Options – Cluster or Notebook ?

If you are not using a ML workspace you can add in using dbutils like this.
dbutils.library.installPyPI("koalas")
dbutils.library.restartPython()

Unfortunately if you are using an ML workspace, this will not work and you will get the error message org.apache.spark.SparkException: Library utilities are not available on Databricks Runtime for Machine Learning. The Koalas github documentation  says “In the future, we will package Koalas out-of-the-box in both the regular Databricks Runtime and Databricks Runtime for Machine Learning”.  What this means is if you want to use it now

Most of the time I want to install on the whole cluster as I segment libraries by cluster.  This way if I want those libraries I just connect to the cluster that has them. Now the easiest way to install a library is to open up a running Databricks cluster (start it if it is not running) then go to the Libraries tab at the top of the screen. My cluster is called Yucca, and you can see that it is running because the circle next to the name is green.

After you are on the Libraries table you will see two buttons.  Click on the one labeled Install New.  A window will appear.  Select the library source of PYPI and in the Package text box enter the word koalas.  Then click on the install button.

Install Databricks LibraryThe installation may take a few minutes.  When it is complete you will see a green  status circle and the word installed.

After this you are ready to use the new library, once you import it as shown here.


Why do I want to install Koalas in Databricks?

If you have written Python code for Machine Learning, chances are you are using Pandas. Pandas dataframes are practically the standard for manipulating the data in Python.  They are not however part of the Spark API.  While you can move your Python code over to Databricks without making any changes to it, that is not advisable.  Databricks is able to scale pandas, so adding more resources to your code may not improve the performance.  When writing Python code for Databricks you need to use the Spark APIs in order to ensure that your code can scale and will perform optimally.   Prior to April of 2019, that meant that you had to use Spark dataframes and not pandas dataframes, which could involve a bit of rework when porting code as much code was written in pandas.  In April of last year Koalas was added to Spark, meaning that changing code to use a pandas dataframe to a koalas dataframe means that you only have to change one word. Koalas contains all of the functionalities of a pandas dataframe, so if you are familiar with one you can use the other.

More About Koalas

koala getting hlep from a Firefighter

Photo Credit:New York Fox 5

It is impossible for me to load the library without thinking about the Australian Bush Fires which are burning the homes of people and Koalas.  If your finances allow it, please consider donating to the firefighters as I am sure they can use help to save the homes of people and animals in Australia.


Regards,

Yours Always

Ginger Grant

Data aficionado et SQL Raconteur


Introduction to Databricks

As I have been doing some work on Databricks, I thought that it would make sense that I start writing about it. Databricks is a scalable environment used to run R, Python and Scala code in the cloud. It currently can be run in either AWS or Microsoft’s Azure Cloud. For those of you who are budget-minded when it comes to learning new tools, there is also a free tier, which is available here Community.cloud.databricks.com . It has somewhat limited compute capacity, but if you are just starting out you might find it helpful.

Backstory

Databricks is an implementation of Apache Spark, part of the Hadoop collective and was a replacement for Map Reduce. Many of the people who worked on that open source project were students at Berkeley, where Apache Spark was created and added to Apache in 2013. Like many development projects, after it was completed, they had some ideas on how to improve the code. This time they decided to not make it open source but make it a commercial product so they could make some money for their development efforts. In April of 2017 Databricks was released on AWS and in March 2018 it was released in Azure.

Creating an Azure Databricks Service

Creating a Databricks Service is very straight-forward. There are only a few things that you need to complete when creating a new Databricks instance. The location becomes very important if you are looking at higher level performing instances which may not be available in all locations. Additionally, security considerations are also important for you if there is plenty of sensitive information being stored and accessed. You can either take up the exams yourself to learn about them (check out SC 900 dumps dumps here) or if that seems like a stretch, then hire someone with the know-how. Well, all of this only comes into the picture if you are working on a company project and not just for the sake of learning. If you are just getting started don’t worry about high level hosting services as you most likely will not need them and most of the compute options are available in most data centers. As always in Azure you want to make sure that you are hosting your Databricks service in the same location as your data so you will not need to pay to transfer data between data centers.

The Pricing Tier contains three options: Standard, Premium and Trial(Premium 14 Days). The trial is pretty self-explanatory and is a great way to get started using Databricks. They are of course a few differences between Standard and Premium. Premium has extra features needed for teams including Role-Based rights for the components of Databricks. And if you want ODBC authentication and Audit logs you will need to use Premium. For more information on the cost of Databricks pricing tiers, check out Microsoft’s pricing link for more information.

Once you have an instance created, you can start using Databricks. The application is contained within a managed instance, so once you launch Databricks you will be in their environment, which looks the same as the free edition.


Clusters, Notebooks and Data

These three components are the most important parts of Databricks as they include the compute power, where you write code and the information you work with respectively. These components are all separated in Databricks to improve scaling and provide a familiar environment to create and run code.

Cluster

The most important Databrick element, as it contains the compute. This is also the part of Databricks which will greatly increase your bill as the more resources you use to run code the more money you need to run it. One nice thing is clusters by default will terminate in 120 minutes of inactivity. I generally drop this to 20 minutes. If I am using it naturally it will not terminate, but if I am not using it, I want the charges to stop. You can also automatically spin up clusters to run jobs, so that they will only be in use when the job needs them. More about that in another post.

Notebooks

Databricks Notebook Import

Databricks Notebook Import

There are 3 supported languages in Databricks, R, Scala and Python, and within Databricks all of these languages are written in Notebooks. You don’t have to write your code in the environment. You can write it locally and then import it. However, if you want to export your Notebook then run it locally, it gets trickier. Natively all of the Notebooks in Databricks are saved as .dbc files. You can’t read them from anywhere else. Fortunately there is a workaround to format the Notebook files as .ipynb files which can be read by any notebook. Dave Wentzel from Microsoft has an elegant solution to convert .dbc to .ipynb which he includes in his blog here.

Data

You have a lot of options with data. You can import a dataset into your environment to play with or you can connect to just about anything you can think of. When you start doing data connections is when you stop using the community edition as you will want to use the Azure version to this to connect to various data resources like Azure SQL and blob storage. More on how to that later in an upcoming post.

If you are interested in hearing more about Databricks and are in Chicago, I am teaching an all day class as part of SQL Saturday Chicago and would love to have you attend. More information on that class is here.

Yours Always

Ginger Grant

Data aficionado et SQL Raconteur

Upgrading a data model from Power BI to Tabular got a lot harder

If you were looking to upgrade a Power BI model to Analysis Services Tabular, hopefully you decided to do it before March 1, 2019, that was the day Microsoft decided to remove the tool from Azure. I know I needed to upgrade after that and I was really sorely disappointed. I also blew my schedule as the upgrade process went from a 20 minute process to something that took over 2 hours. I am writing this blog to save you some time as I learned a few tricks which I wish I would have known about before upgrading.

Preparing your Power BI model to Upgrade to Tabular

Unless you are upgrading to analysis services on SQL Server 2019, chances are you are going to have to review your DAX code and make some modifications as DAX on the other versions of SQL Server are not the same as Power BI. I was upgrading to AS on SQL Server 2016, there were some commands that I had to manual edit out of the JSON file. If you have any new DAX commands, take them out of your Power BI Model which means you will not have to manually edit the JSON file to remove them when the new commands are flagged as errors. Make sure your Power BI Model does not include commands such as SELECTEDVALUE, GENERATESERIES as well as all of the automatically generated date hierarchies. After your Power BI desktop file is clean, leave it running as you are going to need to have it running for the next step.

Connect to your Power BI Model in Analysis Services

Power BI is running a version of Analysis Services tabular and once you figure out what version is running; you can connect to it.  Open up the Task Manager and take a look at the Power BI Desktop in the Processes tab by clicking on the arrow at the right-hand side so that you see all of the processes running.  You see by the picture here, that there are 19 processes running with one Power BI file loaded. Right click on the instance of Microsoft SQL Server Analysis Services running within Power BI Desktop and select Go to Details. This command will bring you to the Details table in Task Manager and will highlight which version and PID to connect in Analysis Services on your computer. You will notice my PID is 3992.  Using this number I went to the command prompt and typed

Netstat -anop TCP | findstr 3392. 

This command returns the address I need to access Power BI model from Analysis Services, 127.0.0.1:51328

That’s it. Now I can look at my Power BI model in SQL Sever Analysis Services from within Management Studio.  It looks like this

TL;DR This model is not usable and you will have to do some tweaks to it to make it work.  The first step is to fix the connections, then edit some JSON. Right click on the connection and select properties. Click on the ellipse button next to the connection string, and you will get this error message. 

Once you click ok, you can edit the connection to something that will work.

All of my Power BI tables were connecting to views in SQL Server, which is a best practice as this allows you to select only the fields you need and provides you with the ability to sort your data as it is read in, which can improve the compression.  I changed the Provider to SQL Server, and fixed the connection.  Once the connections are changed, you will need to create an XMLA script and edit it. Right click on the Database with the GUID name and select Script->Script Database As->Create To-> File.  Give the file a name as you will be using it after connecting to your analysis Services instance. 

Editing the XMLA File

Open up the XMLA file you created in Analysis Sr.  The first thing you will need to fix is the compatibility level.  Power BI set the value to 1465. 1400 is for Azure AS, SQL Server 2017 and 2016 use 1200, so I edited the script to change the value 1200.  I also changed the database name to “SampleAS” from the GUID that it was assigned. I then executed the script, and got my first error

Executing the query …

The JSON DDL request failed with the following error: Unrecognized JSON property: variations. Check path ‘model.tables[0].columns[11].variations’, line 362, position 30..

Run complete

I typed Ctrl G and entered the line number to fix the first error which was on this line

                “formatString”: “dddd\\, mmmm d\\, yyyy”,

I deleted that line and ran it again. This time I got this error.

Executing the query …

The JSON DDL request failed with the following error: Unrecognized JSON property: variations. Check path ‘model.tables[0].columns[11].variations’, line 361, position 30..

Run complete


Line 361 starts with the word variations. The section is contained within square brackets [].

   “variations”: [

                  {

                    “name”: “Variation”,

                    “relationship”: “dc6b309e-0967-4eea-8e3f-7a308661dca5”,

                    “defaultHierarchy”: {

                      “table”: “LocalDateTable_c6cfa169-57d3-4da3-bcbc-21b677dde835”,

                      “hierarchy”: “Date Hierarchy”

                    },

                    “isDefault”: true

                  }

                ],

Date Hierarchies are not supported the same way in AS, so I need to edit the XMLA to remove this section. I will need to repeat this step for every auto-generated data hierarchy I have, which is why I recommend that you remove them as it will save you a lot of time. Another line which caused an error was this line.

                  “query”: “SELECT * FROM [Rates]”,

My view is not called Rates. It is called vw_PaidRates. The table in the Power BI model is called Rates. There is no table or view called rates so I needed to change Rates to the name of the view vw_PaidRates. I repeated this for every table in the XMLA file. I estimate that the editing process took over an hour to eliminate all of the code that would not work. After that I was able to create an project in visual studio using the Import From Server(Tabular) option.

Upgrade Process from Power BI to Tabular

The process was tedious, and it made me long for the 15 minute Azure AS conversion. The method I outlined here is not supported by Microsoft, so it is up to you to make it work.  I have been able to successfully convert a model, just takes a lot of time. Fixing the Power BI model up front helps, and it would also help if little of your text is formatted but there are some things, like the query fixes that you just have to do on your own. I understand that the conversion process is much easier if you are using SQL Server 2019 as that version of Analysis Services is mostly compatible with the version created by Power BI.  Unfortunately I don’t have any clients yet who are using 2019.  I hold out hope it will be easier to do next time, but I will allow for a lot more time to make the conversion happen.

Yours Always

Ginger Grant

Data aficionado et SQL Raconteur